Navigation

Showing posts with label Process Builder. Show all posts

Thursday, August 20, 2020

Automatically share child records using Process Builder and Visual Flow


This blog post demonstrates how to automatically share custom child record(s) with a user using Process Builder and Visual Flow. 


Problem

Out-of-the-box Salesforce functionality doesn’t allow child records to be automatically shared when a user accesses its parent record. Without additional custom functionality, child records need to be manually shared with users which would be very time-consuming.


Use Case

A company has one or more child companies (distributors). When a user accesses a parent company record they also want access to its child company records (distributors).


Solution

Process Builder and Visual Flow can be utilized to automatically share child records when a user accesses the parent record.  


Custom object Company contains a self-lookup Distributor which enables a parent/child relationship between a Company parent record and one or more child Company (Distributor) records. 


Custom object Company Sharing is related to Company via a master-detail relationship and stores sharing information. 


To implement our solution, we will carry out the following tasks:


  1. Create custom objects.

  2. Create Visual Flow Share Company & Distributor Record to User.

  3. Create Process Builder Company Share - On Create & Update.


1. Create Custom Objects


1.1 Create a custom object Company to store company information.


Object Name

API Name

Singular  Label

Plural Label

Data Type

Company

Company__c

Company

Companies

Text


1.2 Add the following fields:


Field Name

API Name

Data Type

Company Name

Name

Text

Address

Address__c

Text Area

City

City__c

Text

Country

Country__c

Text

Distributor

Distributor__c

Lookup(Company)

Email

Email__c

Email

Phone

Phone__c

Phone

Postal Code

Postal_Code__c

Text

State

State__c

Text


1.3 Create a custom self-lookup field Distributor on the Company object to store all the child Distributor records. 


Field Name

API Name

Data Type

Description

Distributor

Distributor__c

Lookup

Store child Company record


1.4 Create a custom object Company Sharing to store sharing information.


Object Name

API Name

Singular  Label

Plural Label

Data Type

Company Sharing

Company_Sharing__c

Company Sharing

Company Sharing

Text


Image of object here ->


1.5 Add the following fields to Company Sharing.


Field Name

API Name

Data Type

Access Level

Access_Level__c

Picklist

Company

Company__c

Master-Detail

Company Share ID

Company_Share_ID__c

Auto Number

User

User

Lookup(User)


Image of object here ->


2. Create Visual Flow Share Company & Distributor Record to User


Visual flow Share Company & Distributor Record to User transfers ownership of Company and Distributor record to the user when a Company record is created or updated.


2.1 Start Button default it will appear.

2.2 Create a userId input variable and check the Available for input.


2.3 Create CompanyId variable and check the Available for input


2.4 Create AccessType variable and check the Available for input


2.5 Select Decision element from left side panel if company id not equal to null 


 →   Toolbox →  Element →  Logic →  Decision


2.6 Select Create Record element from left side panel to Share the Company Record to User create the Share: Company object record.


 →  Toolbox →  Element →  Data →  Create Record


2.7 Select Get Records element from the left-side panel to get the list of Distributor record  equal to companyId from the Company object.


 →  Toolbox →  Element →  Data →  Create Record


2.8 Select Loop element from the left-side panel to iterate the Distributor record  from the List of Distributors.


 →  Toolbox →  Element →  Logic →  Loop


 →  Create SingleDistributor record variable to store Company record.


2.9 Select Assignment element from the left-side panel to assign the Company Share record to value to Create Company Share Record.


→ Toolbox →  Element- →  Logic →  Assignment


→  Create SingleCompanyShareRecord record variable to store Share: Company record.


2.10 Select Assignment element from the left-side panel to assign the SingleCompanyShareRecord to CollectionCompanyShare variable.


→ Toolbox →  Element →  Logic →  Assignment


→  Create CollectionCompanyShare record variable. 


2.11: Select the Create Record element from the left-side panel to create the bulk of Company Share records using this variable CollectionCompanyShare.


3. Create Process Builder Company Share - On Create & Update


3.1 Create Process builder Company Share - On Create & Update which runs each time a Company Sharing is created or updated. 


→ Select Company Share object

→ When a record is created or edited


3.2  Criteria is defined as: When a Company Sharing record is created or when fields Company__c, User__c and Access_Level__c are changed. 


The criteria is defined by using the following formula:


OR(ISNEW(),
ISCHANGED([Company_Sharing__c].Company__c ),
ISCHANGED([Company_Sharing__c].User__c),
ISCHANGED([Company_Sharing__c].Access_Level__c ))


Step 3:  When the criteria is met, Visual Flow Share Company & Distributor Record to User is called using the following variables:


CompanyID  →  Field Reference [Company_Sharing__c].Company__c

UserId          →  Field Reference [Company_Sharing__c].User__c

AccessType →  Field Reference [Company_Sharing__c].Access_Level__c


Conclusion

In our example, Process Builder and Visual Flow creates and updates the Company Sharing object to enable Company and Distributor records to be automatically shared with users, therefore removing the need for records to be manually shared.


When a new Company Sharing record is created, users automatically gain access to all the Distributor records.


This solution satisfies the Use Case by providing a practical way to automatically share child records with users. It demonstrates how Process Builder and Visual Flow can be utilised to create an elegant and powerful solution to manage record sharing. 


Tuesday, April 28, 2020

Preferred Communication Email update into the email field on Contact object using Process Builder


Automatic update of Contact’s Email field
using Process Builder

This blog post demonstrates how to automate the update of the standard Email field on Contact when
a contact requests a change to their preferred email address.

Normally, a single default email address is stored on the Contact but there are times when multiple
email addresses are required. However, only one email address, the Preferred email address,
can be used for single or mass email communication. The Preferred email address is required and,
usually stored in the standard Email field on the Contact.

Typically, when a contact requests a change to their Preferred email address, the System Admin or
Support Team manually updates the standard Email field. This is time consuming and therefore is a
good candidate for automation. This post explains how to automatically maintain the standard Email
field on Contact using Process Builder and custom picklist. 

Requirement:

Automatically update the standard Email field on Contact with Preferred email address based on
a contact’s preferred communication method selection. 

Step 1: The standard Email field is used to store different email addresses based on the contact’s
preference.

Email   →  (standard Email field on Contact). 

Step 2: Create 4 custom Email fields on the Contact to store different email addresses. 


S No
Field Name
API Name
Data Type
Description
1
Primary Email
Primary_Email__c
Email
Store Primary Email Address
2
Personal Email
Personal_Email__c
Email
Store Personal Email Address
3
Company Email
Company_Email__c
Email
Store Company Email Address
4
Additional Email
Additional_Email__c
Email
Store Additional Email Address
(if required)


Step 3: Create a Custom picklist field to store the different email options. 


S No
Field Name
API Name
Data Type
Values
1
Preferred Email
Preferred_Email__C
Picklist
Primary Email
Personal Email
Company Email
Additional Email


Step 4: Create a Classic Email Template to send the confirmation on the preferred communication
changes.  

Dear {!Contact.FirstName} {!Contact.LastName},

This is to confirm that your preferred communication email has been changed in our system.
You will now receive all subscription emails at your new preferred email address.

If you change your mind, feel free to call us and update your preferences.

Thanks & Regards,
Support Team


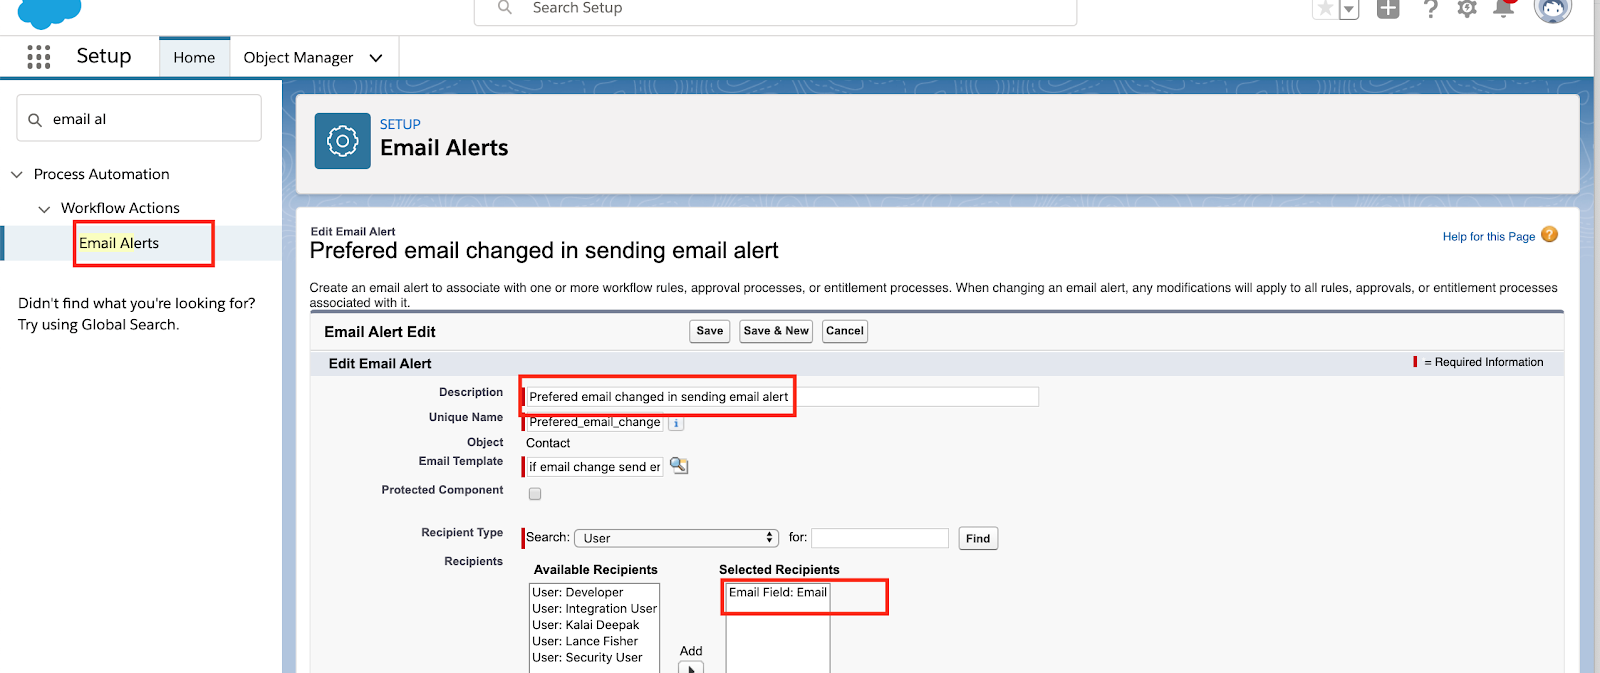
Step 5: Use Process Builder to create an email Alert that sends an email about preferred
communication changes.


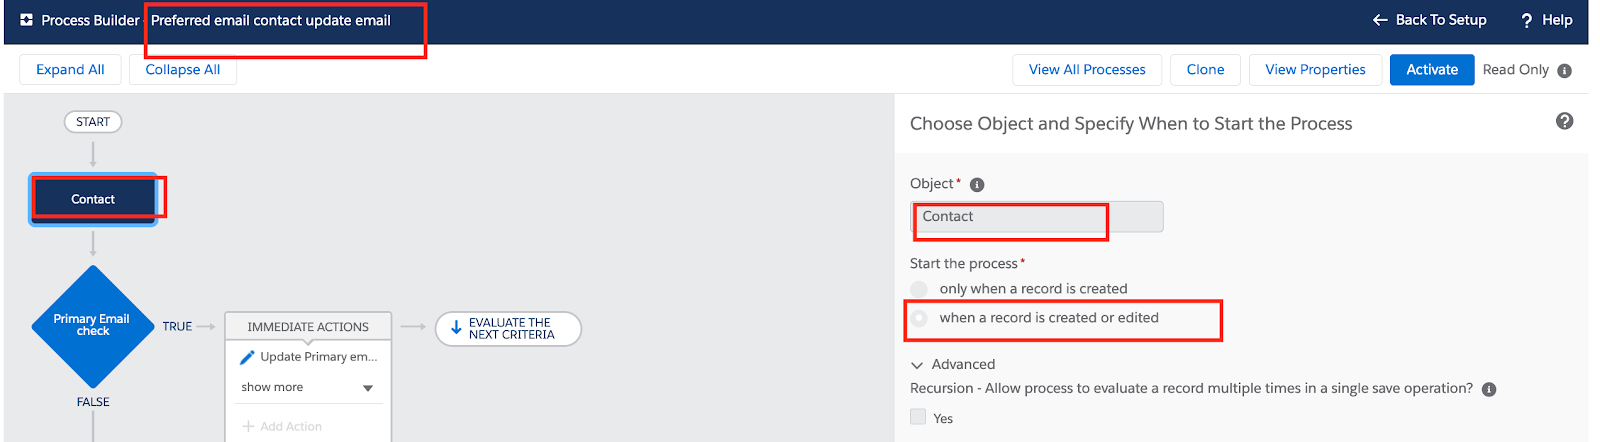
Step 6: Create Process builder “Preferred email contact update email” which runs each time a
Contact is created and every time it is updated. The specific email address will be updated on
the common email fields. 

→ Select Contact object
→ When a record is created or edited


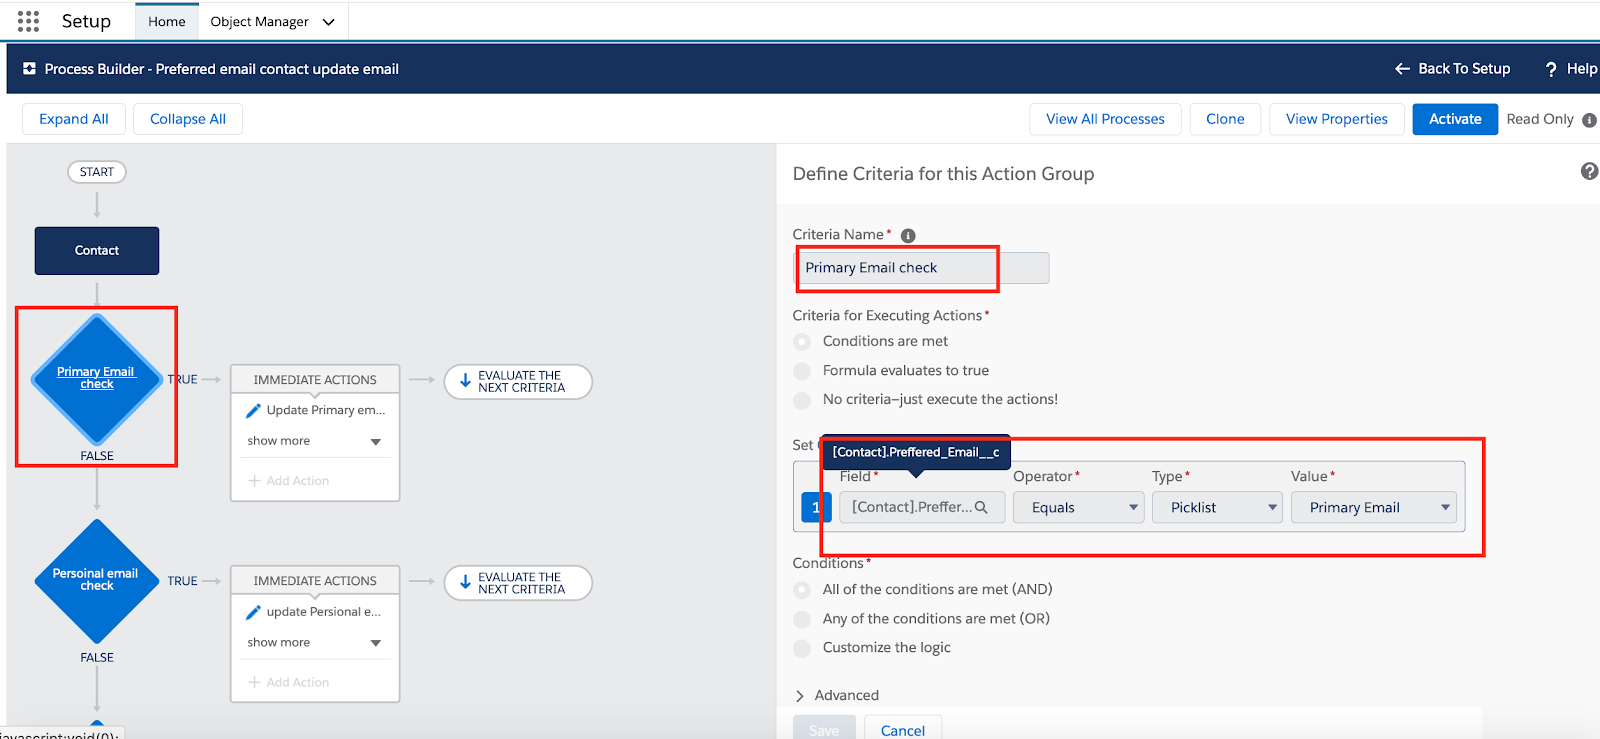
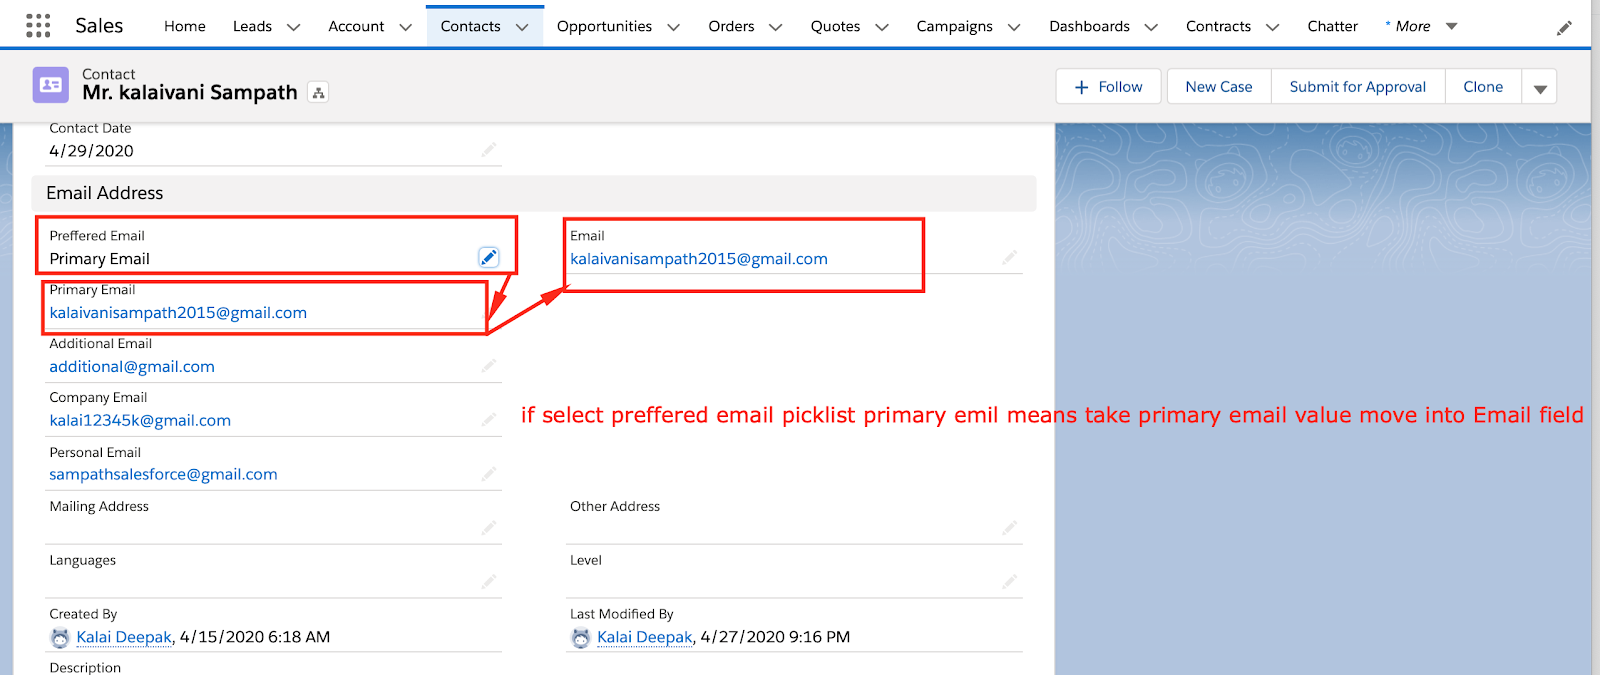
Step 7 :  Define Criteria for this Preferred Email equal to Primary Email.

  Preferred_Email__c ->Equal->Picklist->Primary value


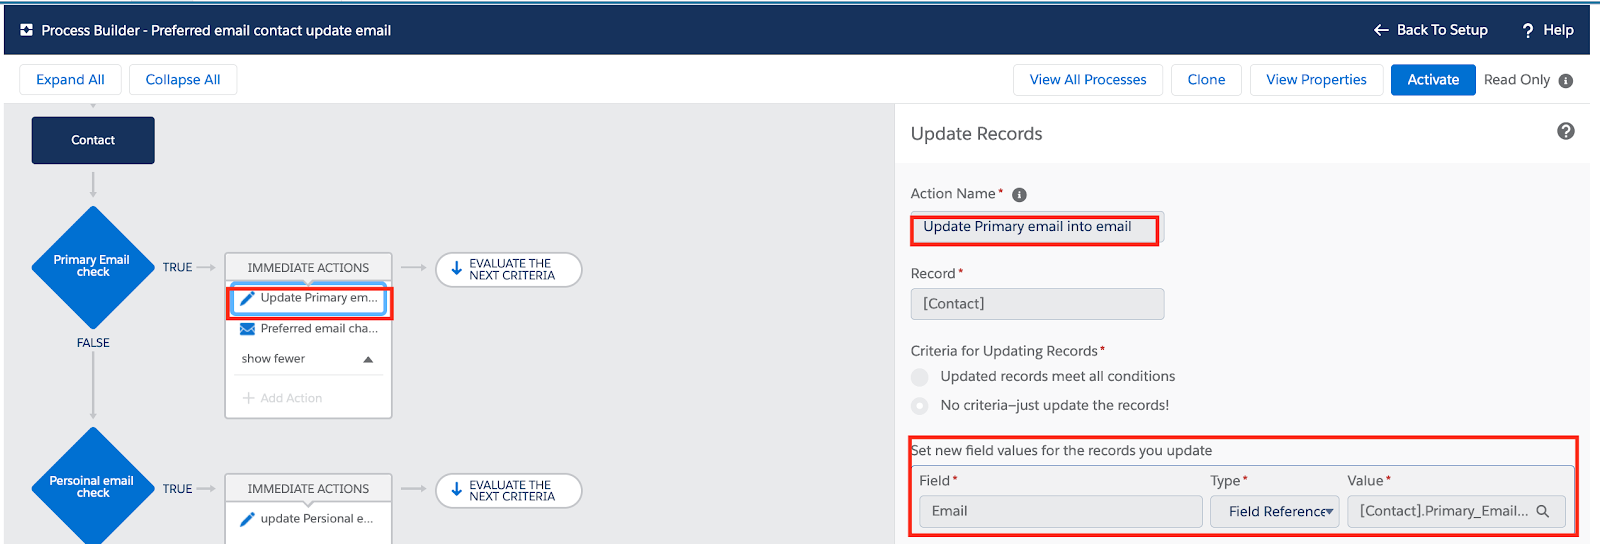
Step 8 : Add a field update action to update Primary Email address values into the Email Field.

Email->Field Reference->Primary_Email__c


Step 9:  Create an email alert action to send a confirmation email to the new Preferred email
address. 


Step 10:  Define Criteria for this Preferred email is equal to Personal Email address. 

    Preferred_Email__c → Equal →  Picklist → Personal Email


Step 11: Add a field update action to update the Personal Email Address. 
   
   Email->Field Reference->Personal_Email__c


Step 12 : Create an email alert action to send a confirmation email to the new Preferred email
address. 


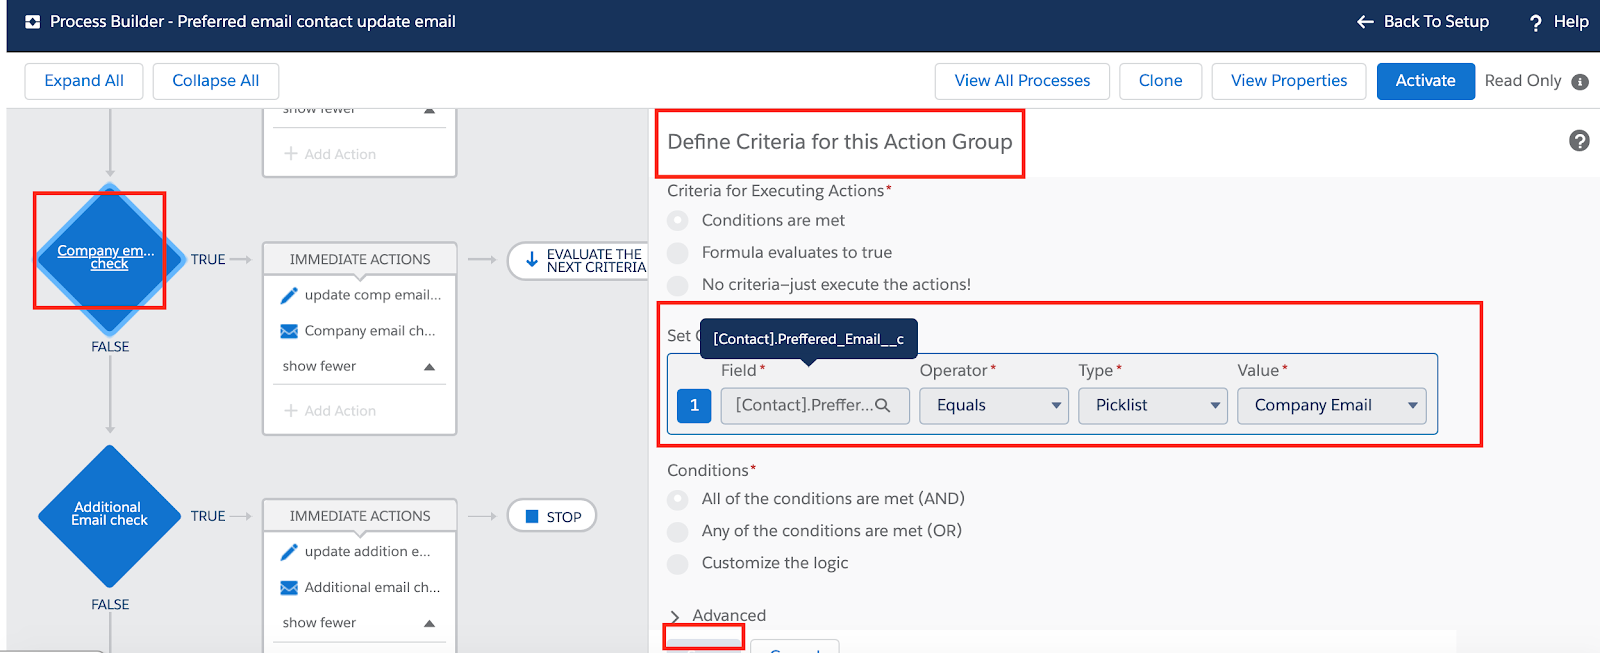
Step 13: Define Criteria for this Preferred email equal to Company Email
               Preferred_Email__c->Equal->Picklist->Company Email


Step 14:  Add an field update action to update Company email address.
  
                Email->Field Reference->Company_Email__c


Step 15: Create an email alert action to send a confirmation email to the new Preferred email
address. 


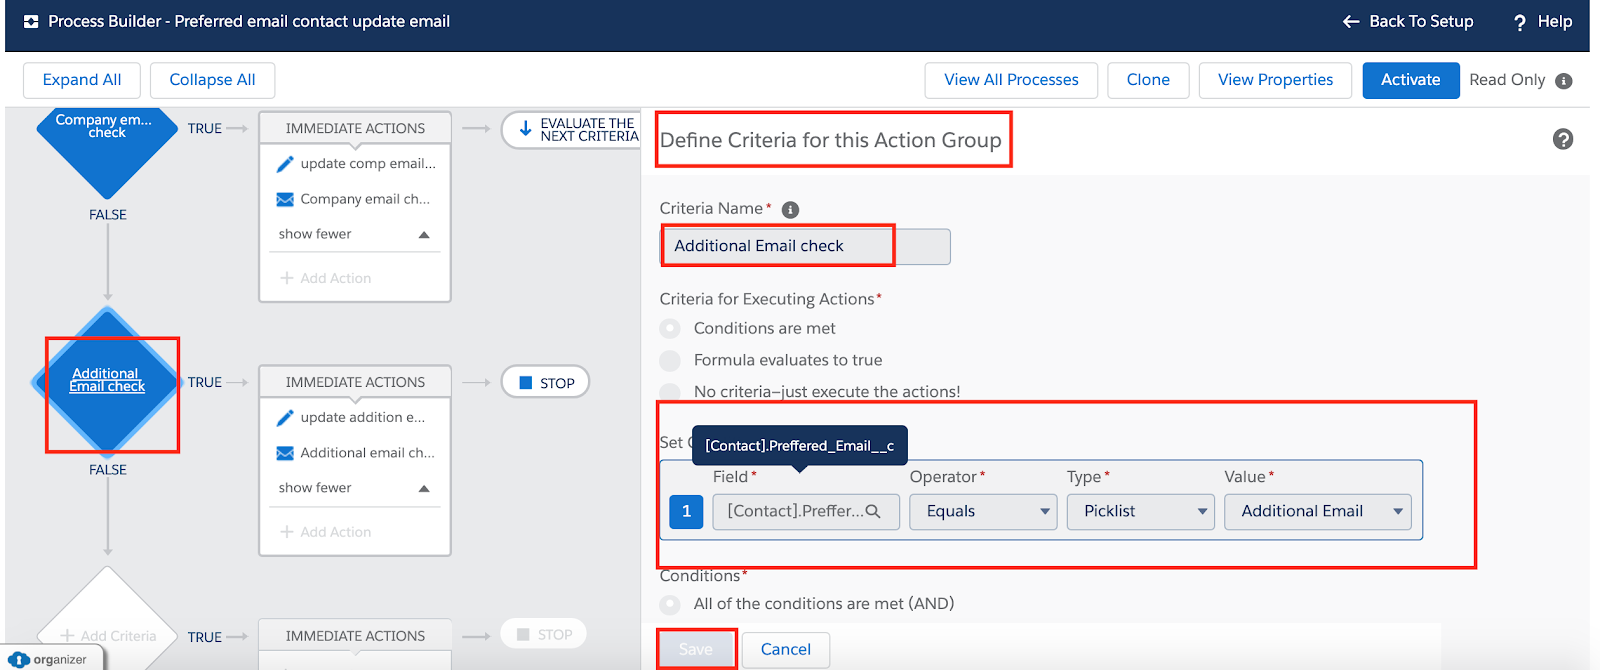
Step 16: Define Criteria for this Preferred email equal to Additional Email

  Preferred_Email__c->Equal->Picklist->Additional_Email__c


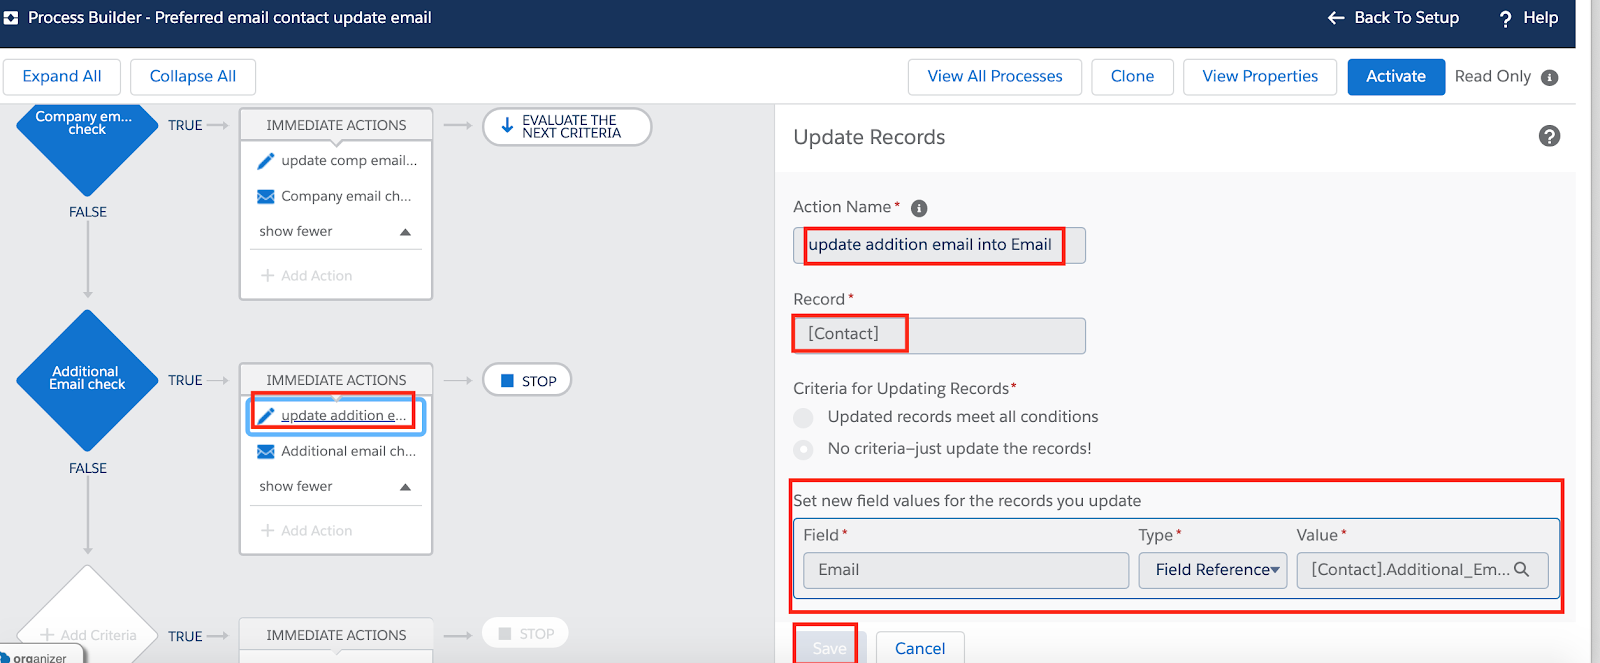
Step 17: Add an field update action to update the Additional email address into the Email field. 
  
   Email->Field Reference->Personal_Email__c


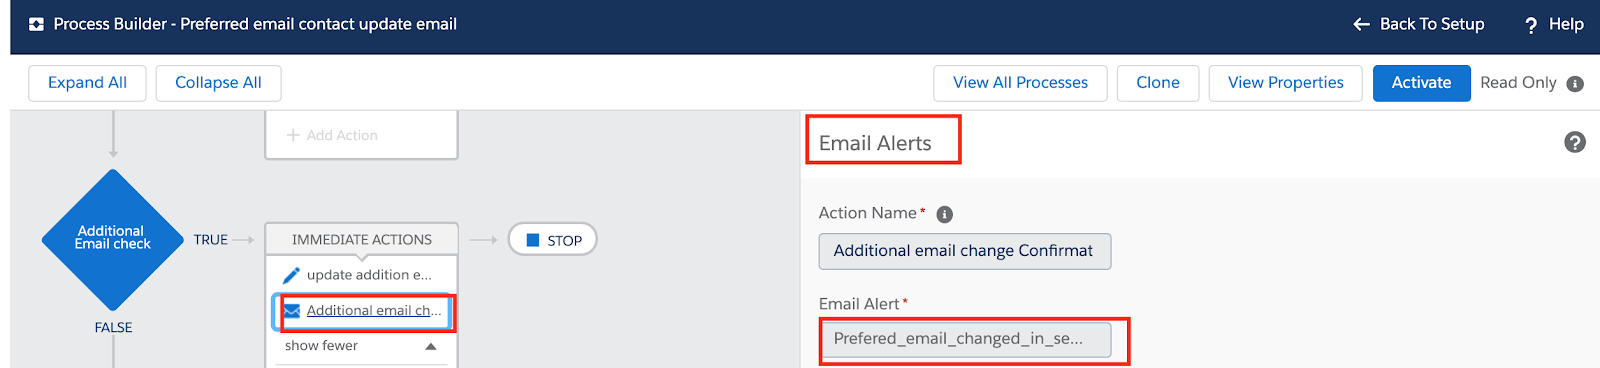
Step 18:  Create an email alert action to send a confirmation email to the new Preferred email
address.


Output


This approach provides an elegant solution to automate the maintenance of Preferred email
addresses. Using a custom picklist to select a contact’s preferred communication method
automatically updates the standard Email field on Contact and sends a confirmation email to
the contact.