Automatic update of Contact’s Email field
using Process Builder
using Process Builder
This blog post demonstrates how to automate the update of the standard Email field on Contact when
a contact requests a change to their preferred email address.
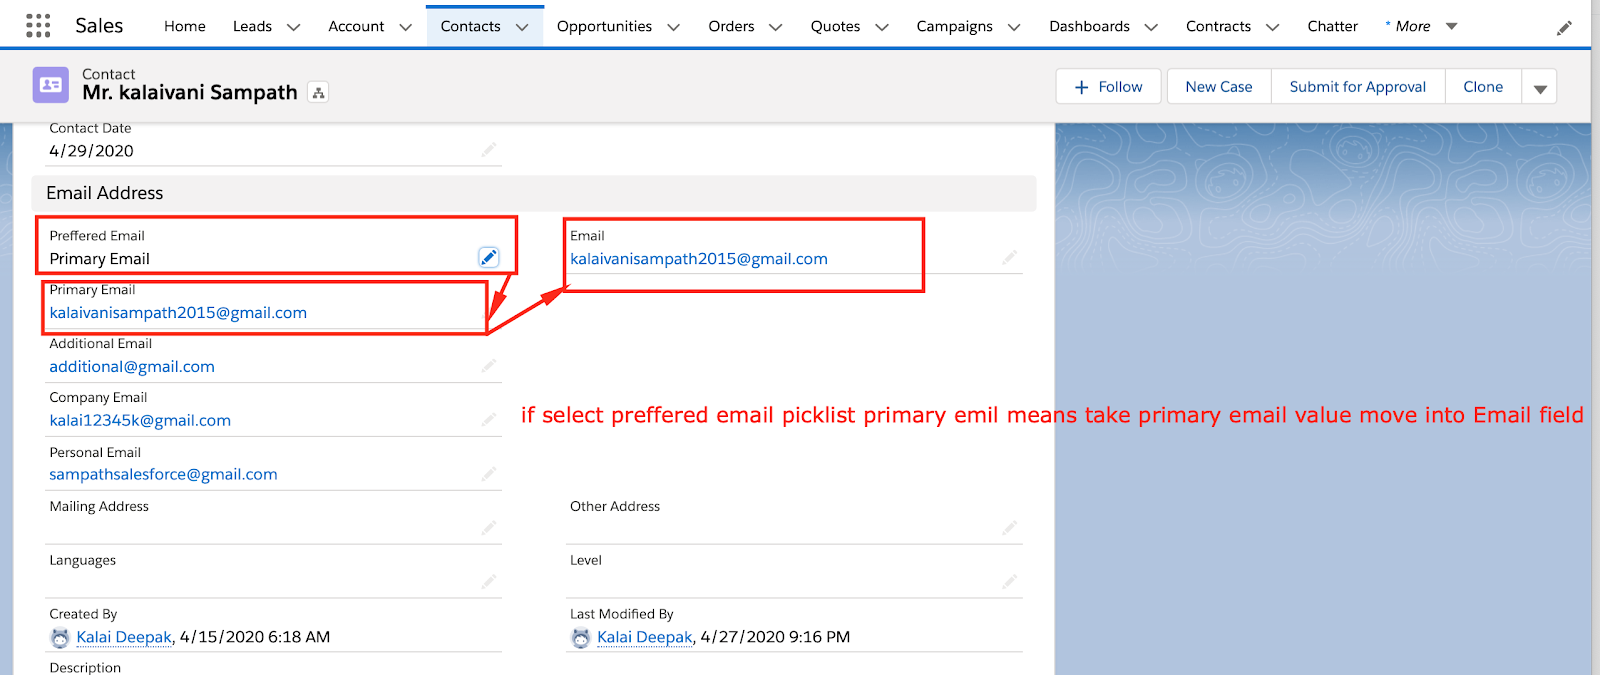
Normally, a single default email address is stored on the Contact but there are times when multiple
email addresses are required. However, only one email address, the Preferred email address,
can be used for single or mass email communication. The Preferred email address is required and,
usually stored in the standard Email field on the Contact.
Typically, when a contact requests a change to their Preferred email address, the System Admin or
Support Team manually updates the standard Email field. This is time consuming and therefore is a
good candidate for automation. This post explains how to automatically maintain the standard Email
field on Contact using Process Builder and custom picklist.
Requirement:
Automatically update the standard Email field on Contact with Preferred email address based on
a contact’s preferred communication method selection.
Step 1: The standard Email field is used to store different email addresses based on the contact’s
preference.
Email → (standard Email field on Contact).
Step 2: Create 4 custom Email fields on the Contact to store different email addresses.
Step 3: Create a Custom picklist field to store the different email options.

Step 4: Create a Classic Email Template to send the confirmation on the preferred communication
changes.
changes.
Dear {!Contact.FirstName} {!Contact.LastName},
This is to confirm that your preferred communication email has been changed in our system.
You will now receive all subscription emails at your new preferred email address.
You will now receive all subscription emails at your new preferred email address.
If you change your mind, feel free to call us and update your preferences.
Thanks & Regards,
Support Team

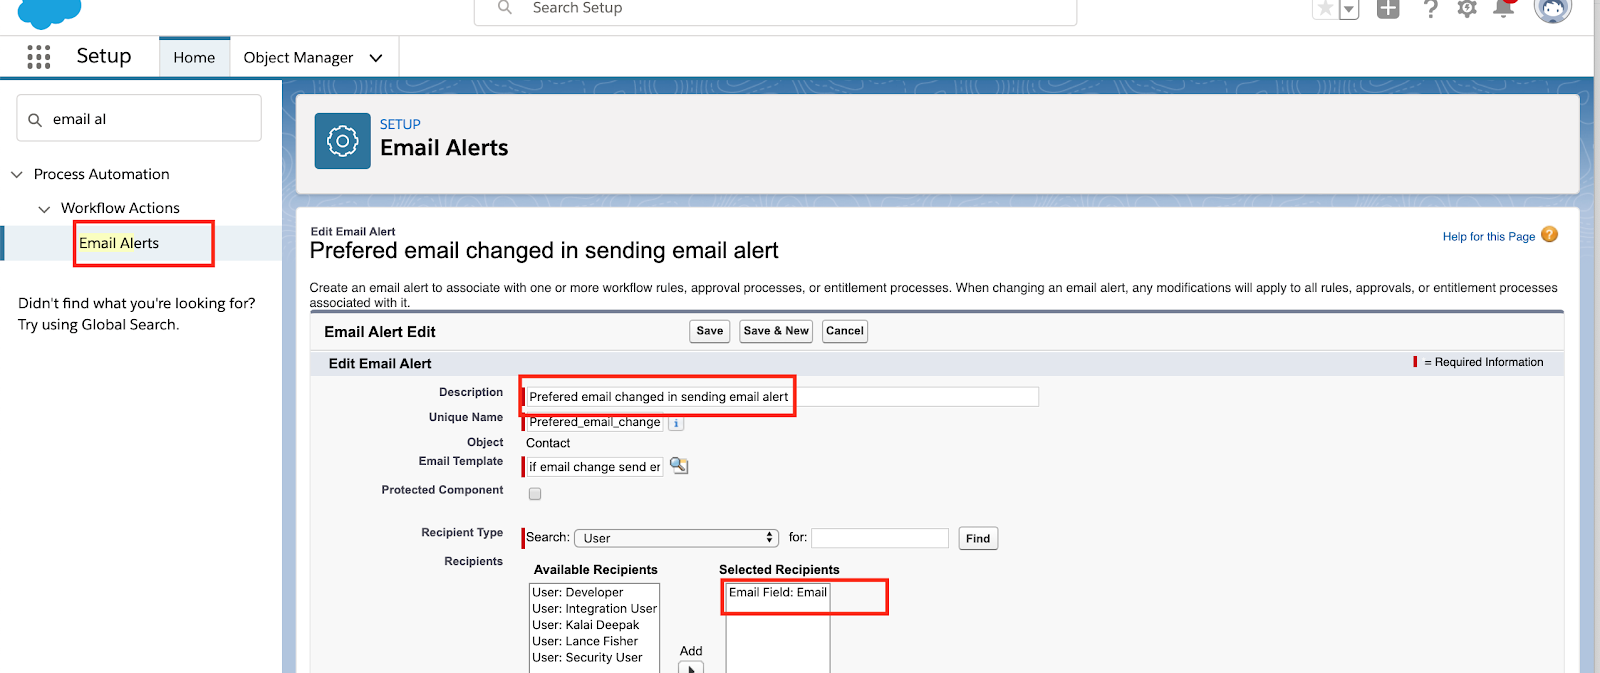
Step 5: Use Process Builder to create an email Alert that sends an email about preferred
communication changes.
communication changes.
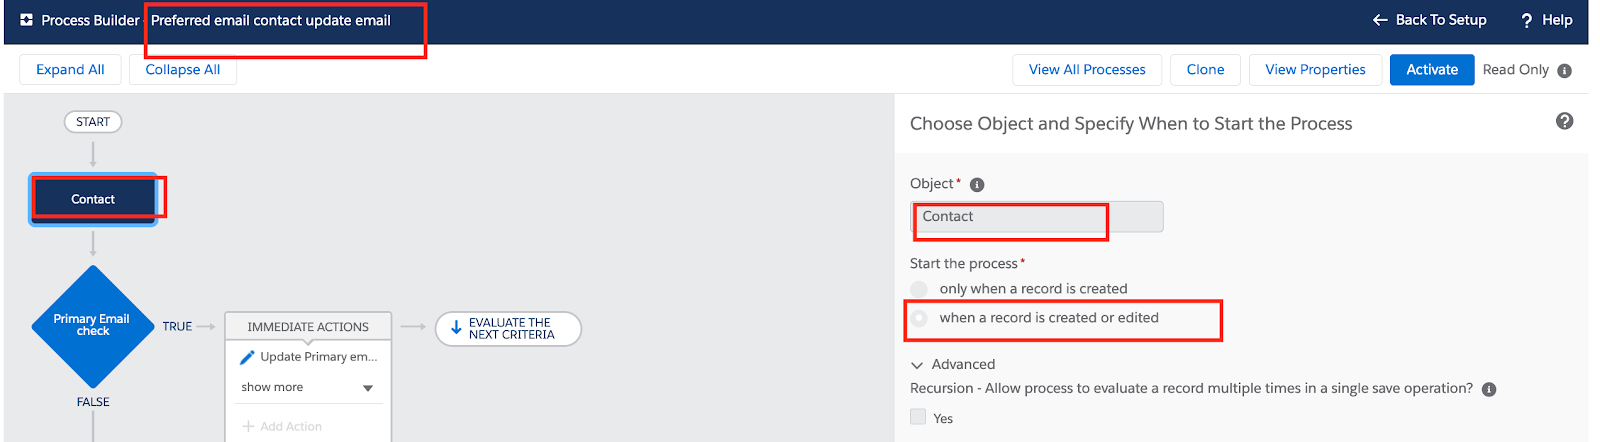
Step 6: Create Process builder “Preferred email contact update email” which runs each time a
Contact is created and every time it is updated. The specific email address will be updated on
the common email fields.
Contact is created and every time it is updated. The specific email address will be updated on
the common email fields.
→ Select Contact object
→ When a record is created or edited
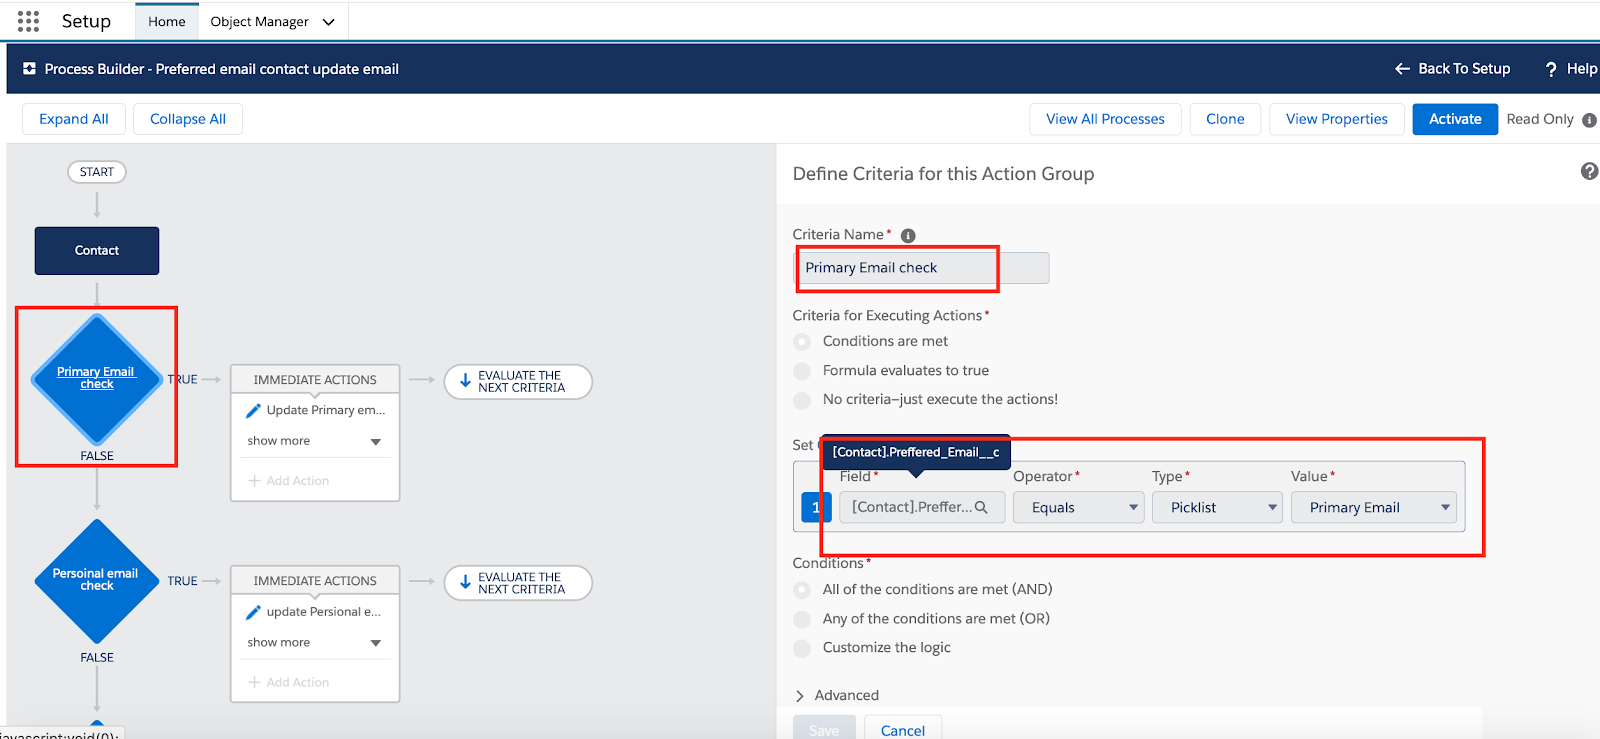
Step 7 : Define Criteria for this Preferred Email equal to Primary Email.
Preferred_Email__c ->Equal->Picklist->Primary value
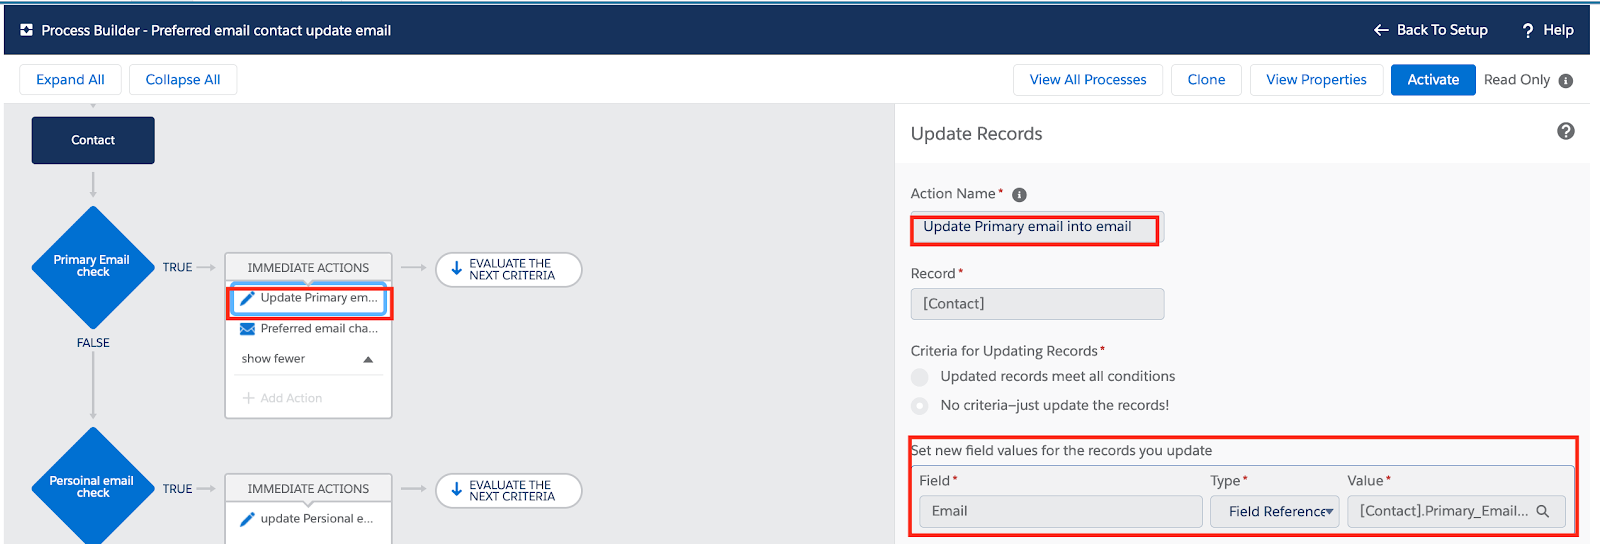
Step 8 : Add a field update action to update Primary Email address values into the Email Field.
Email->Field Reference->Primary_Email__c
Step 9: Create an email alert action to send a confirmation email to the new Preferred email
address.
address.

Step 10: Define Criteria for this Preferred email is equal to Personal Email address.
Preferred_Email__c → Equal → Picklist → Personal Email

Step 11: Add a field update action to update the Personal Email Address.
Email->Field Reference->Personal_Email__c
Step 12 : Create an email alert action to send a confirmation email to the new Preferred email
address.
address.

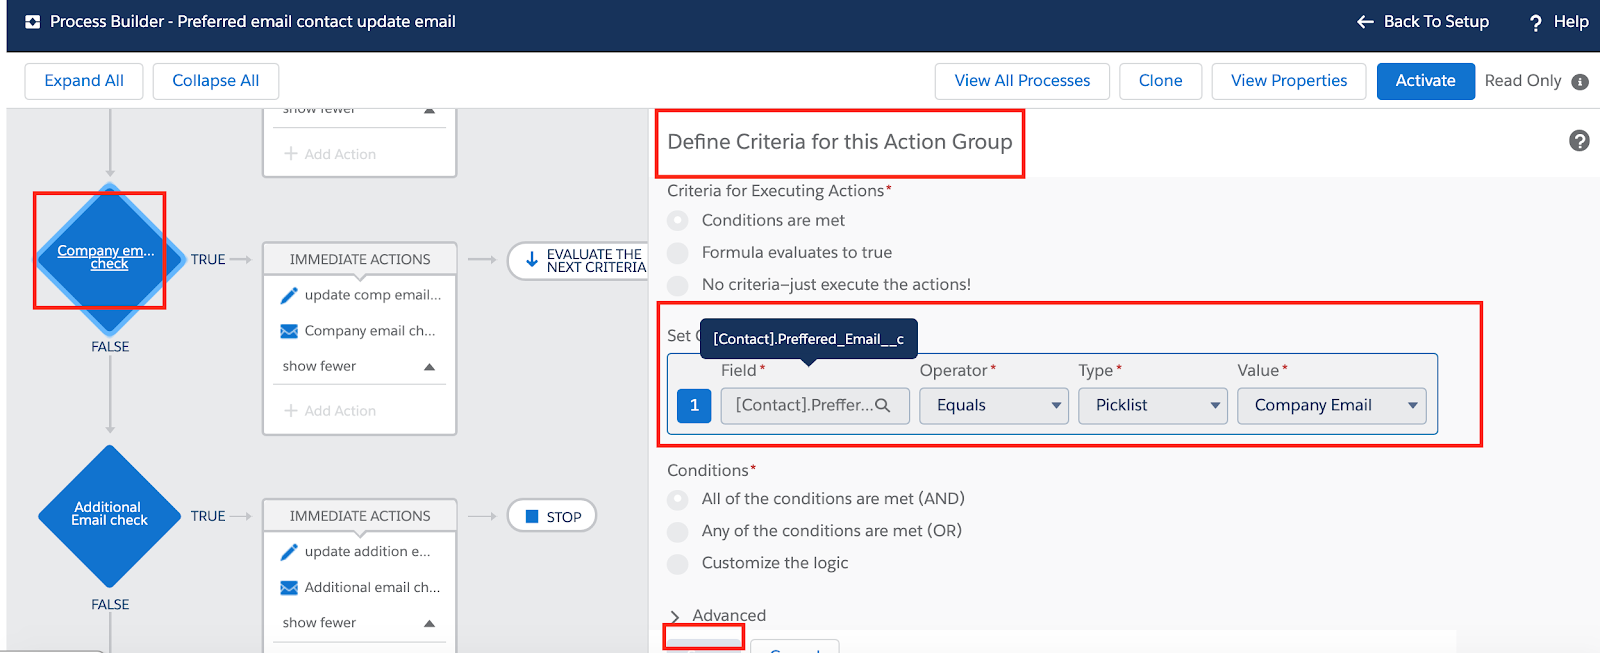
Step 13: Define Criteria for this Preferred email equal to Company Email
Preferred_Email__c->Equal->Picklist->Company Email
Step 14: Add an field update action to update Company email address.
Email->Field Reference->Company_Email__c

Step 15: Create an email alert action to send a confirmation email to the new Preferred email
address.
address.

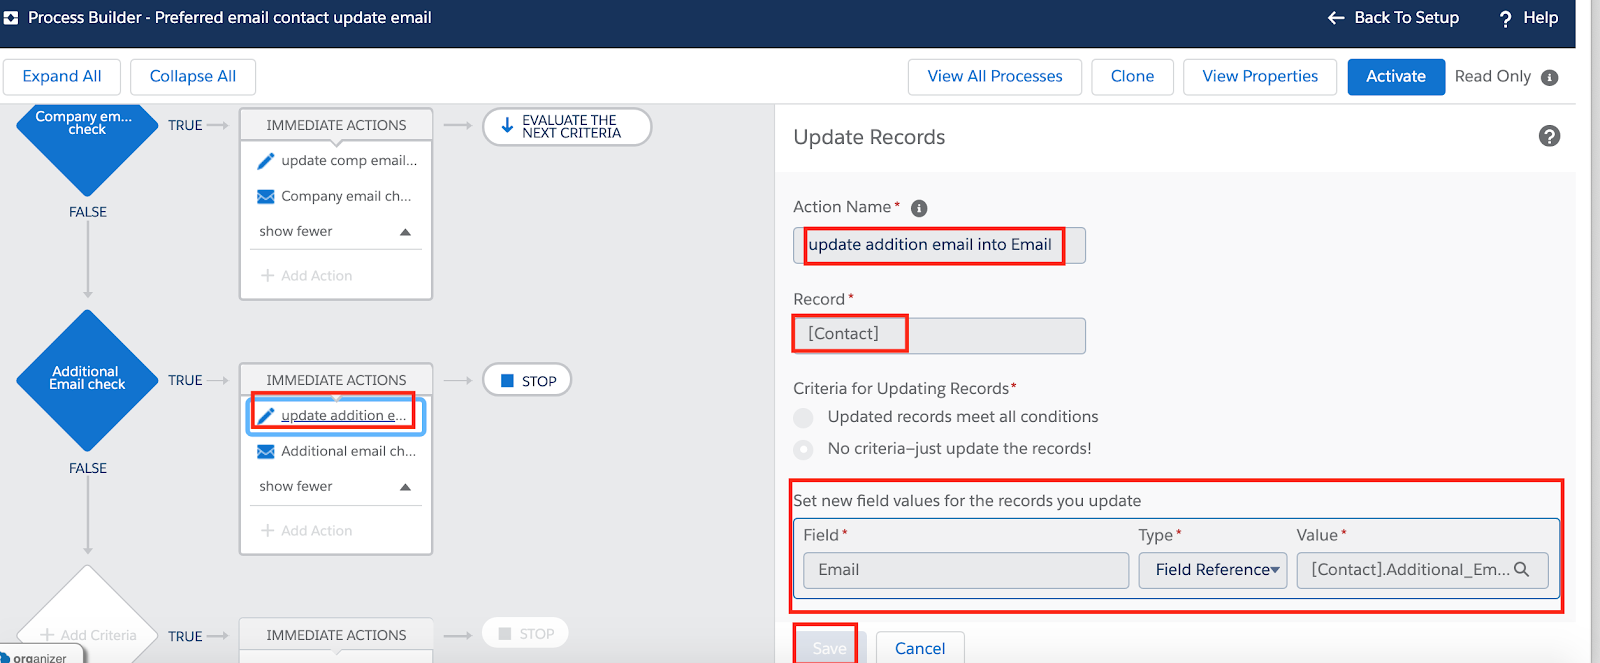
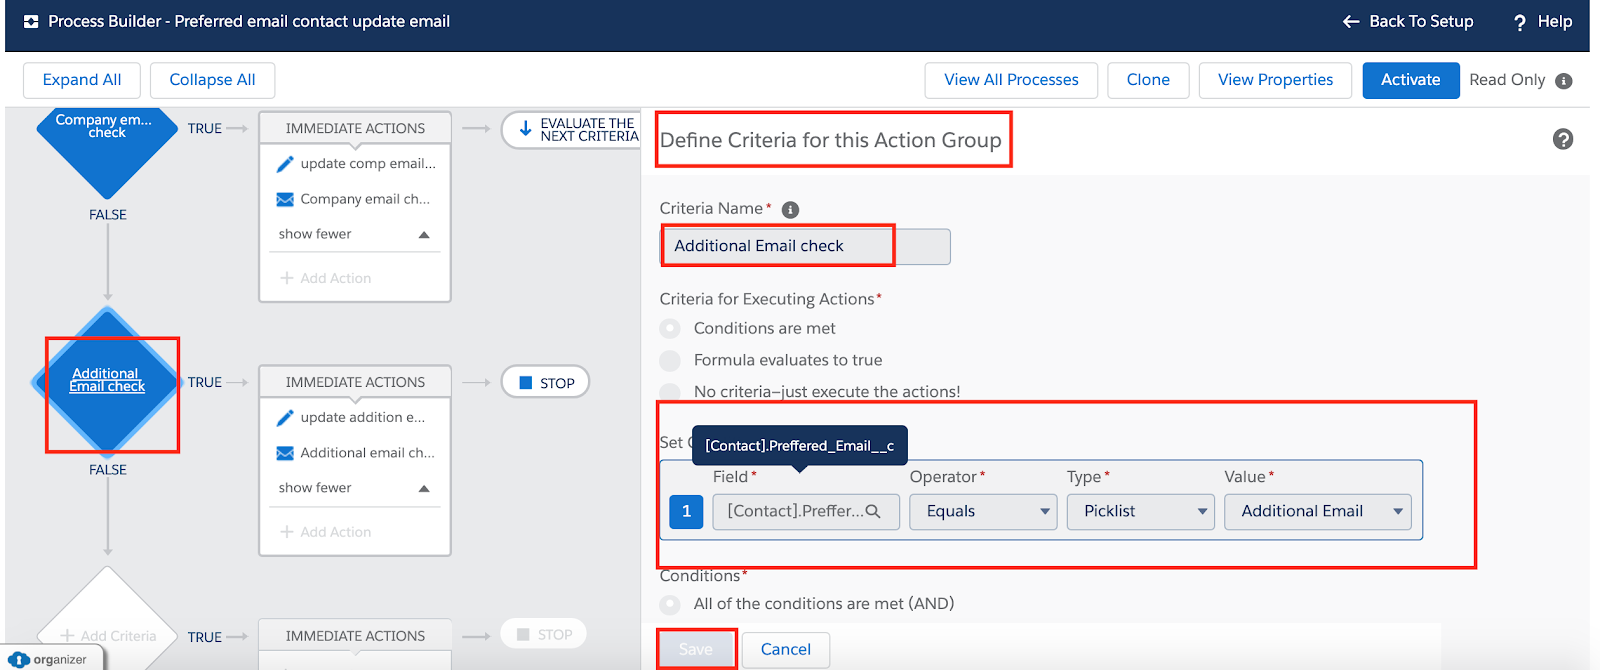
Step 16: Define Criteria for this Preferred email equal to Additional Email
Preferred_Email__c->Equal->Picklist->Additional_Email__c
Step 17: Add an field update action to update the Additional email address into the Email field.
Email->Field Reference->Personal_Email__c
Step 18: Create an email alert action to send a confirmation email to the new Preferred email
address.
address.

Output
This approach provides an elegant solution to automate the maintenance of Preferred email
addresses. Using a custom picklist to select a contact’s preferred communication method
automatically updates the standard Email field on Contact and sends a confirmation email to
the contact.
addresses. Using a custom picklist to select a contact’s preferred communication method
automatically updates the standard Email field on Contact and sends a confirmation email to
the contact.


